Showing posts with label Kid-Tested. Show all posts

Sunday, October 16, 2011

Candycorn Cupcakes


Thursday, I was in the grocery store.  And I spotted candy corn.  I don't even like it that much.  But I had to buy it.  It was calling out to me.  It is nearly Halloween, after all.  I just knew I could turn it into an interesting cookie.  But, then I didn't.  Instead, I made cupcakes.

These actually turned out to be much cuter than I really thought they would.  And, the cake recipe was fantastic.  It's a little complicated in that you mix up most of the batter, but then you whip up a meringue and fold it into the batter.  This step adds a fluffiness to the cake that takes it from being an ordinary, every day cupcake to a very tender, exceptional one.


Candy Corn Cupcakes:
2 large eggs, separated

1 3/4 cups sifted cake flour

2 teaspoons baking powder

1/4 teaspoon salt
1 teaspoon cinnamon

1/2 cup Earth Balance vegan butter, at room temperature

1 cup granulated white sugar, divided

1 teaspoon pure vanilla

1/2 cup rice milk

1/8 teaspoon cream of tartar


Preheat oven to 350.


Separate eggs and set aside.
Sift together the cake flour, baking powder, salt and cinnamon and set aside.


In the bowl of an electric mixer fitted with the paddle attachment, cream the butter until soft, about 1 minute.  Add 3/4 cup sugar and beat until soft and fluffy, 2-3 minutes.  Add in the egg whites, one at a time, and beat after each addition.  Add the vanilla and mix well.  Scrape down the sides of the bowl as needed.  Add the flour mixture in three batches, alternating with the milk, beginning and ending with the flour mixture.
Move the mixture to a separate bowl.

For this next part, you need the bowl of your mixer to be very clean.  Squeaky clean. 
In the bowl of a stand mixer fitted with the whisk attachment, beat the egg whites until foamy.  Add the cream of tarter and beat on high speed until soft peaks form.  Slowly add the remaining 1/4 cup sugar and beat on high until stiff peaks form.  With a rubber or silicone spatula fold in some of the egg white mixture into the batter mixture.  Fold until combined and then fold in the remaining egg white mixture.  Be careful not to overfold so the mixture doesn't deflate.  

Divide the batter evenly among three bowls (or, two additional bowls to the one you already have.  Each bowl should contain 1/3 of the batter mixture).  Add Americolor orange gel coloring to one of the bowls.  Add egg yellow to another.  Leave the third without coloring.
Divide each color of batter evenly among lined cupcake pan, starting with the uncolored batter on the bottom, followed by the orange, topped off by the yellow.  Bake for 18-25 minutes (mine took 21 minutes).
While cupcakes are cooling, mix up your favorite frosting.  Also divide it into thirds and color just like you did the batter.  Put each color into a disposable piping bag.  Snip a .5 inch section off the tip of each.  Fit another disposable pastry bag with a very large piping tip. (I used this one.)  Insert each of the three bags into the bag fitted with the pastry tube so that you are squeezing all three colors through the tip at once.  (Here's a great tutorial.)  Top with a piece of candy corn and watch them get gobbled up!      

Source:  Cake slightly adapted from Joy of Baking.


Monday, October 10, 2011

Texas Governor's Mansion Cowboy Cookies

I apologize for the lack of posting lately.  Things here have just been, well, busy.  Life seems to get away from me before I even realize it has begun.  My girls are absolutely beautiful and wonderful and make every day worth living (and every night worth waking up several times).  But, they are a handful.  There never seems to be a moment when everyone is happy.  Unless, of course, everyone is sleeping.  But, even then the moments are fleeting.  Baking is typically my refuge, but there just does not seem to be enough hours in the day to bake the things I want.  You should see the list of recipes I've been planning to try - it grows daily!

Despite our wonderful (and reliable) chaos, I have been working on a chocolate nut-free, milk-free macaron with a pretty amazing milk-free filling.  I have the taste down, just not the aesthetics.  So, hopefully that will be on here soon enough.  In the meantime, though, I did whip up these chocolate chip oatmeal cookies.  There's a bit of a back story, and you may find it irrelevant, but well, it's my blog and I feel like telling it (so there)...

*If you are a guy, or are not, or have never been, a nursing mother, you really may not care about this next part.  In fact, you may find it a little TMI and be annoyed by it.  Whatevs.  Just skip on down.*  

As I've mentioned 8000 times before, I am nursing my milk-allergic infant.  We had a bumpy ride the first few weeks (cracking, bleeding, mastitis twice and a nasty case of thrush. Yuck.), but overall things have gone smoothly.  For some reason, though, in the last few days I have become a bit worried about my milk supply.  Truthfully, I have no reason to be concerned.  I've always had oversupply.  If my little one pulls off before let-down has subsided she gets a shot to the face.  And she usually ends up drenched.  But, she's now 6 months old and my supply is evening out a bit.  Instead of waking up leaking and engorged, things are fairly controlled now.  But, I've also been spending lots of time in the gym and I know I'm not drinking the water I should.  As any nursing mom knows, this can all lead to panic.  Where's my crazy-huge supply?  Why am I not walking around with two giant, painful rocks anymore??  What have I done????  Mah poor bay-bay!!!

I know.  And you're right.

But, in order to calm my nerves, I decided to eat me some oats.  Yup.  Oats.  I have read in several places that oats can help to boost your milk supply.  And by several I mean KellyMom.  But, the thing is, I hate oatmeal.  HATE it.  It's just so mushy.  And gross.  Yuck.  But, oatmeal cookies?  I can get behind those.  So, there you have it.  The reason I randomly made oatmeal cookies at 9pm on a Sunday night.

Okay, so if you've made it this far in the post, just bear with me as I quickly explain these cookies...  These are out of the book, Presidential Cookies.  It includes a cookie, or sweet treat, from every administration through President George W. Bush.  (I do not know if a new version has been released since the latest election, so please do not go crying foul over lack of inclusion.)  I have been making Laura Bush's Texas Governor's Mansion Cowboy Cookies out of this cookbook for a few years now, and they are always a hit.  But, somehow, I managed to forget about them and it's now been over a year since I last baked them.  Horrible!

But, these are so yummy.  In fact, in the middle of baking these, I went to nurse my daughter back down to sleep, and when I came into the kitchen again, there were suddenly four less cookies.  In ten minutes.  Obviously, my husband likes them a little.  

Mrs. Bush's recipe calls for coconut and nuts.  Because of our food allergies, I don't use either, but I will include them below so you can add them if you'd like.  Also, I halved her recipe.  The original quantities make either an enormous cookie or an enormous amount of cookies.  Mrs. Bush recommends using a 1/4 cup dough per cookie for giant ones, or 2 Tbs. per cookie for smaller ones.  I just used a large spoon to scoop them and even with the recipe halved still made 25 very large cookies.  If you would like to make her full recipe just double everything (you will need 3 eggs for the full version).   


Laura Bush's Texas Governor's Mansion Cowboy Cookies:

1 1/2 Cup all-purpose flour
scant 1 Tbs. ground cinnamon  (full recipe also calls for 1 Tbs, but I used nearly the full Tbs. in the recipe)
1/2 Tbs. baking powder
1/2 Tbs. baking soda
1 tsp. salt
1 1/2 sticks Earth Balance vegan butter, at room temp (or, regular butter)
3/4 Cup packed light-brown sugar
3/4 Cup granulated sugar
1 egg, 1 egg yolk (3 whole eggs for full recipe)
1/2 Tbs. vanilla
1 1/2 Cup milk-free semi-sweet chocolate chips, such as Enjoy Life
1 1/2 Cup old-fashioned rolled oats
1 Cup sweetened flake coconut
1 Cup chopped pecans (4 oz.)

Preheat oven to 350.  Line baking sheets with parchment paper.

In a medium bowl, mix together flour, cinnamon, baking powder, baking soda, and salt.  Set aside.

In the the bowl of a stand mixer fitted with the paddle attachment, beat the butter on medium speed until smooth and creamy.  Slowly add in the sugars and beat for an additional two minutes.

Add in the egg and yolk, beating well.  Add in vanilla.  On low speed, slowly add in chocolate chips.  Add flour mixture on low speed and mix until just combined.  Add in oats and mix on low until all ingredients are well incorporated (but do not over mix).

Scoop out approx. 2 Tablespoons of dough per cookie (or, 1/4 cup dough per cookie for giant cookies, leaving 3 inches between each) and place on parchment lined cookie sheet.  Bake in preheated oven for 12-17 minutes for smaller cookies (it took mine 13.5 minutes), or 17-29 minutes for the larger cookies.  Makes 2-2.5 dozen using 2 Tbs. dough per cookie.

Enjoy!

Source:  Adapted from Presidential Cookies Cookbook by Bev Young.


Monday, September 26, 2011

Frosting for the Cause - Brush Embroidered Sugar Cookies

Today, I am guest posting over at Frosting for the Cause.  This is a wonderful website dedicated to raising money for cancer research and to sharing our baked goods with those who help cancer patients.  When I signed up for the post, I agreed to donate $25 to cancer research, to do a tutorial and to donate the baked goods from my tutorial to a local cancer or hospice center.  So, today I am delivering my brush embroidered royal icing sugar cookies to the Life With Cancer center here in Fairfax, VA.  While the cookies are certainly a small gesture, I do hope maybe they will bring some joy to the staff who devote their lives to helping patients wage courageous battles against a horrendous disease.  If any of you would like to sign up for Frosting for the Cause, please do.  It certainly is a worthy cause...

Monday, September 19, 2011

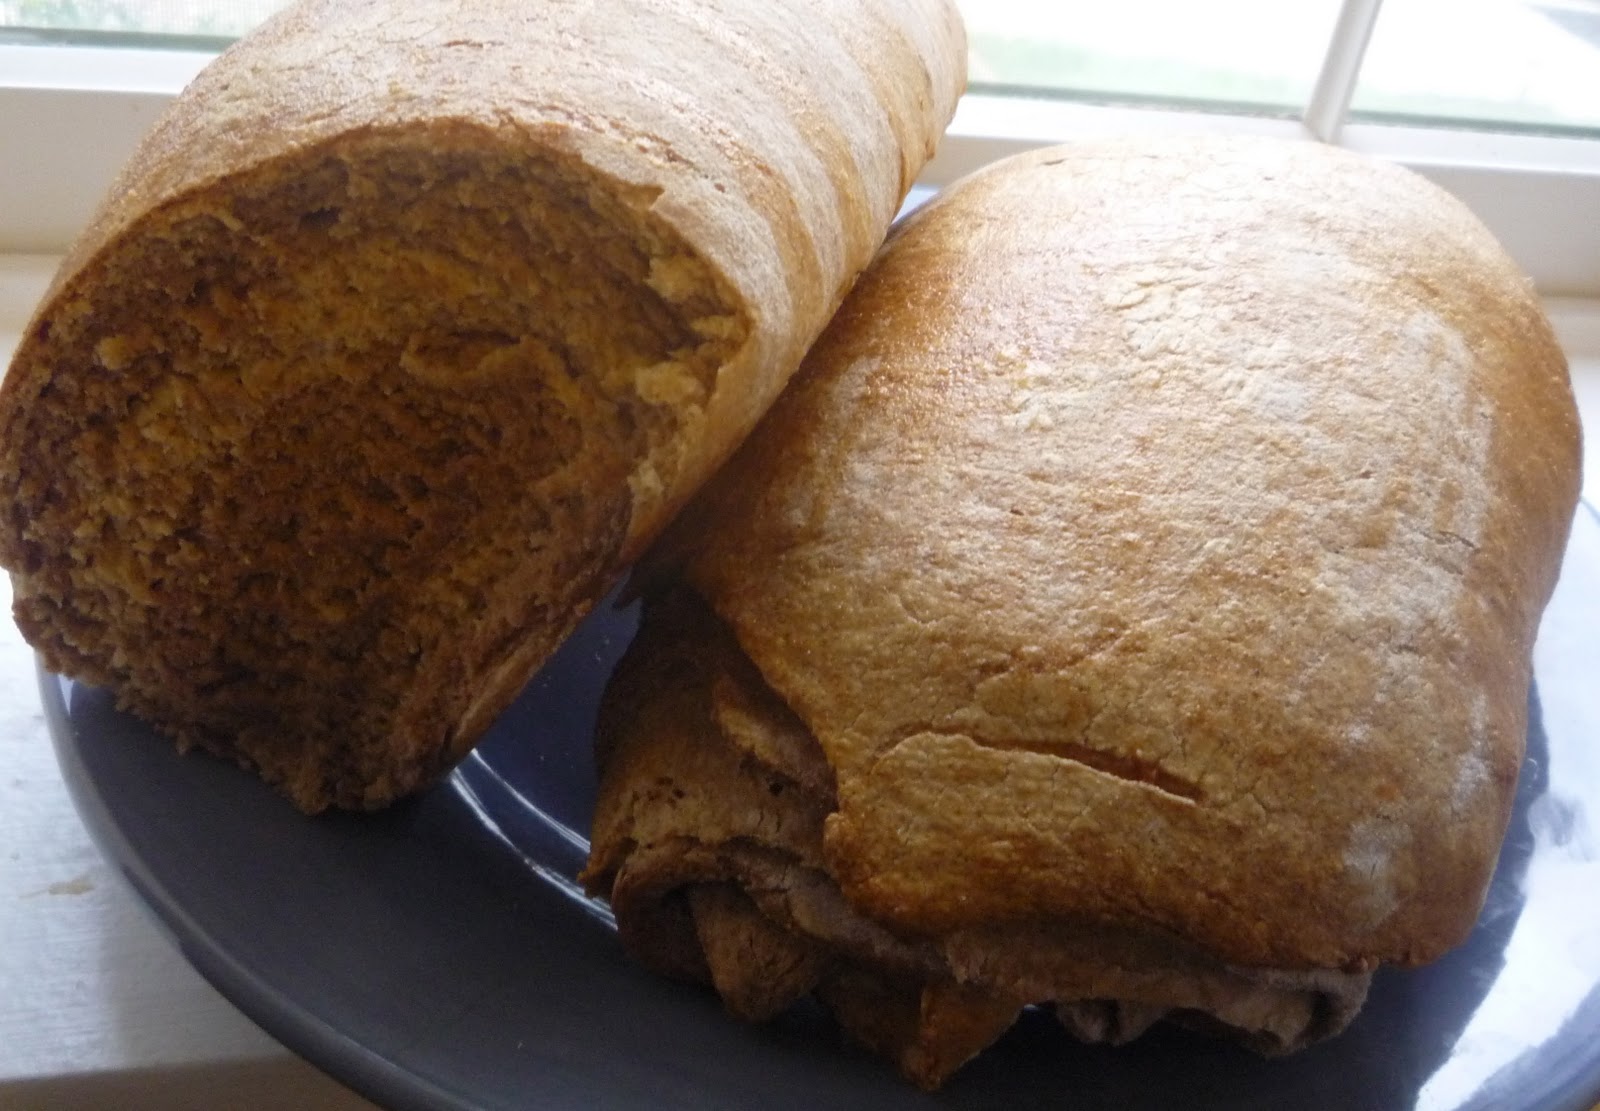
Swirled Rye Bread


Over the last year, I have come to love bread making.  It's relatively easy, and I find the prep and shaping of it to be somehow cathartic.  Plus, it makes a truly impressive final product that will wow almost anyone.  The most difficult part of any bread prep tends to be the proofing (a.k.a. rising) times, as you must be home to make sure your bread is not left out to fall.  As a stay at home mom with a five month old and a 25 month old, I'm typically not far away from home, so that's not usually a problem. But, these last few weeks have been nothing but late night cookie baking and decorating (and traveling alone with my girls on a seven hour road trip...what was I thinking?), so I've been feeling the need to get in the kitchen and well, knead.

(My word-play skills are impressive, aren't they?)

So, I decided it was finally time to delve into my new Peter Reinhart book, The Bread Baker's Apprentice.  I have read it cover to cover several times but just have not had the opportunity to make anything.  His sourdough has been on my list for a while, and I even made a starter for it.  But, we ended up being away so much I wasn't able to feed it like I needed and finally tossed it.  I wanted something, though, to make now.  You know, instant gratification.  No starters - no pre ferments - just good ole flour, yeast and whatever else could be thrown in together.  This rye bread seemed to be the perfect solution.

One of the great things about this recipe is that it is naturally milk free (and if you opt out of the egg wash, it's egg free, too).  I didn't have to make any substitutions or worry that rice milk or vegan butter wouldn't produce the desired results.  It is also an incredibly easy recipe and the proofing times aren't too crazy with a typical two rises, each for 60-90 minutes.  My only issue came when I couldn't find white rye flour.  I was able to find organic rye flour, but not white rye flour, although I plan to order some from King Arthur.  Reinhart does specifically request this white flour, but sometimes you just have to make do.  What came out of the oven was a dense, aromatic and wonderful bread that will be great for toast and sandwiches.  The Monkey even enjoyed it, which is always a welcome surprise.


Light Rye Bread:
1.5 Cups White Rye Flour  (or, rye flour if you cannot find white rye)
3 Cups Bread Flour
1.5 tsp. salt
1.75 tsp. yeast
1 Tbs. molasses
2 Tbs. shortening
1.25 Cups water, plus 2 Tbs. if needed

Dark Rye Bread:
1.5 Cups White Rye Flour (or, rye flour if you cannot find white rye)
3 Cups Bread Flour
1.5 tsp. salt
1.75 tsp. yeast
1 Tbs. molasses
2 Tbs. shortening
1.25 Cups water, plus 2 Tbs. if needed
2 Tbs. Cocoa powder dissolved in 2 Tbs. water (or, 1 Tbs. liquid caramel coloring)

1 egg whisked with 1 tsp. water until frothy.

For the light rye:
Combine the rye flour, bread flour, salt and yeast in the bowl of a stand mixer fitted with the paddle attachment.  Mix on low just long enough to combine.  Add the molasses, shortening, and 1.25 cups water.  Mix on low for about 1 minute until the dough comes together and all the dry bits have been incorporated, adding the 2 Tbs. of water only if needed (I needed it).

Switch to the dough hook and knead on medium low until the dough feels a little tacky but not sticky, about 4 minutes.  (Reinhart suggests adding flour, a little at a time, if needed.  I definitely did not need extra flour).  Place the dough in a lightly oiled large bowl, turning once to coat.  Cover loosely with plastic wrap and proof at room temperature until doubled in size, approximately 90 minutes.

For the dark rye:
Dissolve the cocoa powder in water and set aside.

Repeat process of light rye, adding the dissolved cocoa in at the same time as the molasses, shortening and water.  Also proof this dough at room temp., lightly covered in plastic in an oiled bowl, for 90 minutes.

Once the doughs have doubled in size, *lightly* flour a work surface (I think I probably could have done without the flouring at all and the surface I work on usually needs quite a bit of flour, but just to be safe, do add a very light dusting of bread flour).  Divide each of the doughs into four equal pieces and set aside.  Using a rolling pin, roll each piece into an oblong shape approximately 5 x 8 inches.

Once all pieces have been rolled, begin shaping the loaves:
Stack one piece of dark rye on top of a light piece.  Repeat.  Fold the long edge of one side over the middle of the loaf, like a letter.  Press down with the edge of your hand to seal the dough a little, but do not press so hard you de-gas the bread.  Fold the other side over to complete the letter-like fold, and seal with your fingers.  Lay the folded loaf, seam-side down, on a baking sheet fitted with parchment paper, and proof at room temperature until nearly doubled in size, 60-90 minutes. 

Repeat this process to complete the additional loaf.

Preheat oven to 350.

Gently brush the egg wash onto each loaf.

Bake for 40-45 minutes until the bread is golden and sounds hollow when tapped on the bottom.  Immediately remove to a cooling rack and let cool 1-2 hours before slicing and serving.   

A few notes:
Using rye flour versus white rye flour works fine, but the swirl is not as obvious.   

When forming the loaves, you want the fold to be tight.  If it is too loose the loaf will separate into individual layers rather than baking as one big layer.  But, try not to over-handle the dough.  Rye bread is already a dense dough and you don't want to toughen it anymore than necessary.

Reinhart states one baking sheet should be used for each loaf - two sheets total - but I just used one of my half sheet pans, covered in parchment paper, for both loaves.  He does also say the loaves can be stored in the refrigerator for up to three days before the second proofing.  So, if you want to bake one and chill one, just let one loaf go through the whole process, and store one on a baking sheet in the fridge covered in plastic before it proofs for the second time.  Once you remove it from the fridge, let it proof until almost double in size.

Make sure the seams are facing down when you place the loaves onto the baking sheets.  If you do not, the loaves will expand and open some during baking.

Reinhart also says you can use loaf pans for baking.  I would not do this.  These loaves are very large and when baked without the restricting sides of a loaf pan, they are beautiful and rustic in appearance.




Friday, September 16, 2011

Mason Jars & Volunteers

When I think about these cookies it makes me laugh a little because, really, I just don't think it's possible for these to be more Southern... 

A close family friend (and woman I call the "baby whisperer") placed an order for cookies that looked like mason jars with fireflies flying out of them.  They were for her son's 30th birthday and were to match the invitation.  Rusty is one of the kindest and funniest people I've ever met, and I was so worried about these cookies I actually dreamed about them.  Rather, I had a nightmare that I just couldn't make them work.  I so wanted them to be perfect.  Once they were completed, I loved them.  I personally thought they were gorgeous and just hope everyone at the party did, too.  I covered the "fireflies" in citrus disco dust, and normally would brush away the excess, but the tiny bit left on the cookies added a perfect amount of sparkle underneath the packaging.   


My husband took off to Tennessee with some great friends this weekend to see a football game and to visit with more of our favorite people (Hi, y'all!).  I couldn't let him go down there empty handed so I sent him off with these UT cookies.  I told him they had to at least make it to TN.  From what I understand, they were a big hit and only a few made it to the tailgate.  They were stunning (if I do say so myself), and fairly easy to create.


Our dear TN friends have an adorable 4 year old little girl, as in, you just can't help but smile when you're around her (& her 8 month old brother is just as precious).  So, I wanted to send her a little something special and made these butterfly cookies.  I was actually surprised by how beautiful they were.  I played with disco dust again on a few of them and it was so gorgeous.


 And, I, of course, couldn't let UT be the only team celebrated around here.  Because the girls and I were headed to NC for my dad's birthday, I whipped up a few Tarheel feet, as well.  They were actually really sweet and would be perfect for any Carolina celebration (you know, when we beat Duke).


Wednesday, September 7, 2011

Chocolate Chip Cookie Cups


Okay, so I have to be honest.  This recipe was not what I intended to make when I started baking on Thursday.  I needed to take goodies to a baby shower for a mom in our playgroup.  My vision was of beautiful, buttery phyllo purses filled with sweet goodness.  But, I knew almost immediately it was going to be one of those days.  You know what I mean...the kind of day where anything you attempt in the kitchen is going to be a complete bust.  The butter burns when you try to melt it like you have done successfully 10,000,000,000,000 times before.  The chocolate just refuses to melt, despite being submerged in boiling cream (that you splashed on yourself) and lots of whisking.  The powdered sugar somehow spills all over you, your stand mixer, the floor and and the cat all at once (and your two year old yells, "Mess! Mess!" until you clean it all up).  And, the phyllo dough crumbles in your hands just for spite.

You know, one of those days.  You do have them, too, right?  Or is it just me?

Wait.

Don't answer that.  I don't want to know.

Ignorance is bliss.     

So, this recipe was born out of complete desperation at 8am for a yummy and pretty but quick and uncomplicated dessert.  I had been thinking of trying my hand at cookie cups for a while, and just hadn't done it.  I mean, how hard could it be?  I whipped up my favorite chocolate chip cookie recipe.  Pressed large scoops into a cupcake pan.  Baked.  Cooled.  Voila!  Cookie cups.  It really was that simple.  I then, of course, filled them with cream cheese frosting, and sprinkled a few mini chocolate chips on top.  They reminded me of the gooey cookie cups I used to get at the cookie stand in the mall as a child.  So good, but so, so bad for you.  Eat them with caution.

One final note - I did not make these milk free because I was baking for other people.  But, these would be easy enough to do, and I have included instructions below.


Chocolate Chip Cookie Cups (made from my favorite chocolate chip cookie recipe):
12 tbsp. unsalted butter (or Earth Balance vegan butter), melted
1 cup brown sugar, packed
½ cup granulated sugar

2 cups plus 2 tbsp. all-purpose flour
½ tsp. baking soda
½ tsp. salt

1 egg plus 1 egg yolk
2 tsp. vanilla extract

1 ½ cups Ghiradelli semi sweet chocolate chips

Preheat oven to 325.  Generously grease a muffin tin.

In the bowl of a stand mixer fitted with the paddle attachment, combine melted butter and both sugars.  Cream until well combined.  While the butter/sugar mixture is mixing, combine flour, baking soda and salt in a bowl and set aside.

Once butter and sugars are well creamed, beat in the egg, yolk and vanilla, mixing well after each addition.  With the mixer on low, add in the flour mixture and mix just until combined.  Mix in chocolate chips.

Scoop out enough dough for a large cookie.  Press it into the bottom and around the sides of the muffin tin.  Repeat until each of the cavities in the muffin tin has been filled.  Bake for 13-15 minutes until edges are *just* beginning to brown.  Remove from oven and immediately use a knife to go around the edges and loosen so the cookies will pop out easier when they're cool.  If centers of the cookie cups have risen too much, use a small spoon to press them down a bit.  They will settle more as they cool.

Once the cups are cool, place an inverted cookie sheet on top of the muffin tin and flip them over, so the muffin tin is upside down and on top of the cookie sheet.  Use a knife or wooden spoon and tap each muffin well to loosen the cookie cup.  Carefully lift off the muffin tin and check to see if they've all popped out.  If a few are still left, just repeat the process of tapping and lifting the tin until each of the cookie cups pops out (if the muffin tin is very well greased beforehand this will be much easier).

Use whatever frosting you would like and pipe it into the cookie cups.  Sprinkle a few mini chocolate chips on top for garnish.  Enjoy Life chocolate chips are fantastic for baking without common allergens (or just baking in general), as they taste fantastic. 

For a vegan frosting scroll towards the bottom of this post.
For cream cheese buttercream, make half of the recipe found here.

*Frosting is colored with 2 drops of Americolor Sky Blue.

Source:  Adapted from Annie's Eats.
 

Monday, September 5, 2011

Chocolate Chip Meringue Cookies


This quick and yummy recipe comes from one of my favorite blogs:  Gina's Skinny Taste.  Gina is a genius when it comes to reworking fabulous but fatty recipes into healthier versions.  What I appreciate most about Gina is she doesn't use artificial ingredients.  She uses butter and sugar and oil, but in sparing amounts and combined with ingredients like unsweetened applesauce.  Every recipe I have made from her site has become an instant favorite in our home, including this one.

The main dish for dinner was also from Gina's website - the chicken cacciatore - but I wanted to also whip up a quick, but not too decadent dessert (or, maybe I had a sweet tooth but didn't want to overdo it.  But that's just a maybe).  These little meringues were light and fluffy and delicious.  I wish I had one right now...

Chocolate Chip Meringue Cookies: 
3 large egg whites (room temperature)
1/8 tsp cream of tartar
1/2 cup sugar
1 tsp vanilla extract
1 cup Enjoy Life semi-sweet mini chocolate chips (or other dairy free chocolate chip)


Heat oven to 300.  

Line cookie sheet with parchment paper.

Using a stand mixer with a whisk attachment and a squeaky clean metal bowl (make sure everything is clean and dry), beat the egg whites and cream of tartar together at high speed until soft peaks form (mine were fairly stiff and it took about 10 minutes).

Gradually add the sugar in a little at a time, followed by the vanilla, beating well after each addition until you get stiff peaks, the sugar is dissolved and the mixture is glossy.

Fold in the chocolate chips.

Using a disposable pastry bag (or ziploc bag) with the tip cut off, pipe cookies onto cookie sheet lined with parchment paper and bake for 30-45 minutes (it took me 33 minutes), until the cookies are *just* dry.  Let cool and store covered, at room temperature.  Makes around 30 cookies.

(P.S.  You must also immediately make this recipe for Asian Glazed Drumsticks.  I would have drunk the sauce with a straw if I didn't think my husband would turn away in shame.  I promise to do a post on it later, but do not wait.  Make it.  NOW.)

Source:  Gina's Skinny Taste.

Saturday, September 3, 2011

Hurricane Cookies


Oh, Irene.  Our friends back home in NC are still dealing with the aftermath of Irene.  She was angry when she hit the coast, and it will take a long while to recover completely from her wrath.  But, here in DC, there was much ado about nothing.  Sure, it rained.  And, sure, it was windy.  But, overall, Irene's power had gone bust by the time she drifted through here.  We did lose power for about 12 hours, and I may have stayed wide awake staring suspiciously at the trees that looked like they were tempted to lean on our roof, but other than that, Irene was just, well, a dud.

However, Irene's rain and wind did keep us trapped inside for a day.  So, the Monkey and I made cookies.  Or, I made cookies while she played with water in the sink.  And, what I thought would be a fun activity of frosting them together, turned into her licking the bowl while I tried to get the frosting onto the cookies and off her.  You'd think I'd know by now that the 2 year old always wins.

When it became evident that she had no interest in decorating cookies, I whipped out a pastry bag and used a 1M tip to make roses on the tops of the cookies.  They turned out to be quite pretty, and the icing crusted really well.  This type of frosting (with shortening), is a bit too sweet for me but seems to mellow after it rests for a bit.  These soft sugar cookies, though, are fantastic.  Simply amazing.  You must make them.  Today.

 
Soft Sugar Cookies:
2/3 cup shortening
2/3 cup Earth Balance vegan butter, softened
1 1/2 cups granulated sugar
2 eggs
2 teaspoons vanilla
2 teaspoons baking powder
1 teaspoon salt
3 1/3 cups all purpose flour


Vegan Shortening Frosting:
1/2 cup shortening
4 1/2 cups powdered sugar (no need to sift)
1/4 cups + 2 Tbsp. rice milk
1 tsp. vanilla


Preheat oven to 350.

Cream butter, shortening and sugar together until light and fluffy, about 5 minutes if using vegan butter (3-5 minutes if using regular butter).

On medium speed combine add in the eggs and vanilla and mix until well combined.

With the mixer on low speed, addthe baking powder, salt and flour and mix until it just comes together.

Using a medium dough scoop, roll into somewhat uniform balls, placing approximately 2 inches apart on a cookie sheet lined with parchment paper (don't worry, the dough is supposed to be sticky).

Bake 7 - 10 minutes until edges are *just* golden.

Once cookies are done, let them cool for a few minutes on the cookie sheet until they can be moved to a cooling rack without falling apart.

To make the frosting:
 While the cookies are cooling...with a stand mixer fitted with the whisk attachment and on medium high speed, cream the shortening and powdered sugar together until smooth.  Slowly add in the rice milk and vanilla and mix until smooth.

If you want, color the frosting with whatever color you'd like (I used Americolor electric blue).  You can either spoon the frosting onto the cookies, or use a pastry bag with a decorative tip and pipe on pretty designs.  I used a Wilton 1M tip.

Source:  University of Cookie.


Thursday, August 25, 2011

Snickerdoodle Cupcakes with Fondant Toppers & Two Frostings!

These cupcakes are always a big hit, and they are really quite easy to whip up.  Except for the cake flour, you probably always have each of the ingredients in your cupboards.  They are also easily made to be milk-free.  I used these for my daughter's second birthday, and most recently when I got last minute word that a friend was coming to town with her newborn.  And, as usual, they were gobbled up by kids and adults alike, and my husband moped around a bit when I left the few remaining ones at our friends' house.

On half of these, I used my standard cream cheese frosting.  I wanted to toss in a bit of cinnamon to give it a nice kick, but my husband talked me out of it.  Next time, I will, so if you'd like to as well just throw in a teaspoon or so of cinnamon.  Mix it up to taste.

And, because I was not the only one present avoiding milk for allergy reasons, I used a milk-free buttercream on the other half.  It actually tastes very good considering it is made from vegan butter.  The biggest difference is that it just doesn't become as creamy, and always looks a little "cracked" when it's piped.  As though it needs a bit more liquid.  You can add as much rice milk in as you want, but just be warned that it will never have the nice creamy texture of a cream cheese frosting or traditional buttercream, so don't overdo it and end up with soup.

I also topped these with cute little fondant toppers.  Luckily, I had some marshmallow fondant already all made up, and so just rolled it out (I'll post a recipe for that later), used an impression kit and cut out cute little shapes.  They were adorable and easy.    

Snickerdoodle Cupcakes:
1½ cups all-purpose flour
1½ cups cake flour, sifted
1 tbsp. baking powder
1 tsp. salt
1 tbsp. ground cinnamon
1 cup (2 sticks) Earth Balance vegan butter (or, unsalted butter) at room temperature
1¾ cups sugar
4 large eggs
2 tsp. vanilla extract
1¼ cups rice milk


Preheat oven to 350 and line two cupcake pans with liners.

In a medium bowl combine both flours, baking powder, salt and cinnamon and whisk to combine.

In stand mixer fitted with the paddle attachment, beat the butter and sugar on medium-high speed until light and fluffy, 3-5 minutes (vegan butter takes a bit longer to become fluffy).  Beat in the eggs one at a time, mixing well after each addition.  Add the vanilla.  With the mixer on low, add the flour mixture in three additions alternating with the rice milk, beginning and ending with the flour mixture.  Mix each addition until just incorporated.  Divide the batter evenly among the cupcake pans.  Bake 18-20 minutes until the middle is springy to the touch.  Allow to cool in the pans until cool enough to remove to a cooling rack.  Let cool completely before frosting.

Check this link for Cream Cheese Frosting.
 
For the Vegan Buttercream:
1 stick (1/2 cup) of Earth Balance vegan butter
1 Box Powdered Sugar
1 teaspoon vanilla
2 Tbs. rice milk, to begin


Cream vegan butter and powdered sugar until fluffy, about 5 minutes.  Beat in vanilla.  Add in rice milk, check the creaminess and continue to add rice milk in very small quantities until desired consistency has been reached.

A few notes:

Occasionally, I will briefly refrigerate the frosting so that it holds its shape better when piped.  It seems to be so heavy that is doesn't stay nicely swirled.  Chilling will stop that to some extent, but too long and it will make it crack even more.

For the frostings and fondant toppers I used Americolor Electric Blue and Electric Orange (I also used leaf green for some toppers that aren't pictured).

Source:  Recipe adapted from Annies Eats.

Friday, August 19, 2011

Mexican Manicotti


I'll admit, this post was a bit of an afterthought.  This is one of those dishes that I make when I just don't feel like putting much thought or effort into dinner.  It's delicious and everyone loves it, but it is incredibly easy.  It's so easy, that it just never occurred to me to do a post as I was actually making it.  In fact, it wasn't until I was eating the left-overs today for lunch that it hit me (so please forgive the lack of photos here).  This is exactly the kind of dish I am always hoping to find.  Moms need dishes like this in their repertoire.  And, I have this one because of my mom.  It's one of her go-to's and now it is definitely one of mine.

I typically make this with ground turkey, but it is actually much more decadent (can meat even be decadent?) with ground beef.  And, we don't use any cheese on this since, you know, I can't eat dairy at the moment, and my husband - bless his heart - doesn't like cheese (can you imagine?), but feel free to add it your dish.  I've included it below.

Mexican Manicotti:
1 lb. ground turkey or beef
1 can refried beans
1 packet taco seasoning
1 box manicotti shells
1 cup water
1 large jar of salsa
8 oz. shredded cheese (optional)

Preheat oven to 350.

In a large bowl, combine meat, refried beans, and taco seasoning until thoroughly mixed.  Place the meat mixture into a freezer bag and cut off a tip so the bag can be used like a pastry bag.  Squeeze the meat mixture into the manicotti shells and place the shells side by side in a 9x13 glass baking dish (you may need to occasionally nudge the meat in with a spoon or knife - and it may get a bit messy!).  Once the dish is full of shells, pour 1 cup water over the shells.  Top with the entire jar of salsa.  Cover the dish with aluminum foil and bake for one hour.  Remove from the oven, and if using, immediately top the dish with the shredded cheese.

Enjoy!
 

Monday, August 15, 2011

For my husband...

Even as I type this, I'm not sure which recipe I will choose to accompany this post.  However, it has been on my mind since I read of Jennie's sudden loss.  I don't know Jennie, and only discovered her blog after seeing so many posts in the food blog world in tribute to her husband.  But, I have learned in the last few days that Jennie isn't much different from me.  She has two young girls and a husband she adored.  She laughs and works hard and cherishes her family.  But, last week her husband was suddenly taken from her by a heart attack.  She's now a single mom and a widow, and from what I can tell she's not much - if any - older than me.  This is a time in our lives when we're supposed to be fretting over lack of sleep and how to potty train and teach manners.  We're not supposed to be learning how to cope without our husbands.  Our soul mates.

In loving memory of her husband, Jennie asked that everyone bake a peanut butter pie and share it with the ones they love this past Friday.  I found her posts on Saturday as I was already in the midst of baking a tart for Sunday School.  But, I haven't been able to get her - or her girls - off my mind.  Jennie's enormous loss has made me think about the love I have for my husband and how blessed I am God brought him to me.  I cannot imagine having to face each day without him beside me.  He's an incredible father who brings joy to each of our two daughters every day.  He's my partner, my best friend, my love.  Even in our worst moments, I love him fiercely.  So, with Mikey's memory in mind and in acknowledgement of the turmoil Jennie is facing, I wanted to bake my husband something truly special.  We don't eat peanut butter much in this house, as we are not yet sure if our girls have allergies, but my husband does love sweets.  And, I love baking them for him as they bring him such childlike joy.  I'm blessed not to be standing in Jennie's shoes, and I want to make sure my husband knows how much I truly cherish him.

But, which recipe should I bake?

Well, when my husband treats himself with a sinful, store-bought dessert, it is typically with Little Debbie Oatmeal Creme Pies.  I'll admit, they're a weakness of mine, so he knows to hide them away in his desk somewhere so I don't even know they're in the house.  But, because I know how happy they would make him, I've decided on a homemade version.  These were incredibly easy, and tasty - and I think he'll have to hide them, as well.

On half of the cookie pairs, I added a thin layer of melted chocolate to each inside, then plopped on the creme.  I didn't want to alter the original too much, which is why I only applied the chocolate to half.  (I have a tendency to want to over-complicate things).  It's all just a matter of personal taste, but I've included the how-to for adding it, if you want.

Oh, I also made these milk-free because, well, I'm not an idiot.  I know eventually, I'll give in and eat one.  But, the only ingredient to substitute was the butter.  Otherwise, the recipe is already milk-free.

Enjoy these and make sure you share them with someone you love.  For Mikey.


Homemade Oatmeal Creme Pies:

For the cookies:
1 cup butter (or Earth Balance vegan butter)
3/4 cup brown sugar, packed
1/2 cup granulated sugar
scant 1 Tbs. molasses
1 tsp. vanilla
2 eggs
1 1/2 cup all purpose flour
1/2 tsp. salt
1 tsp. baking soda
scant 1/4 teaspoon cinnamon
1 1/2 cups quick oats (I don't think old fashioned would work as well here)

For the creme filling:
2 tsp. very hot water
1/4 tsp. salt (I used kosher, but I think regular ole table salt would dissolve better)
7 oz. marshmallow fluff
1/2 cup shortening (do not substitute butter.  The flavor will be off.)
1/3 cup powdered sugar
1/2 tsp. vanilla

Preheat oven to 350.

Combine flour, salt, baking soda and cinnamon in a bowl and set aside.  In the bowl of a stand mixer fitted with the paddle attachment, cream together the butter, sugars, molasses, vanilla, and eggs.  Add the flour mixture to the butter/sugar mixture and mix on low until combined.  With the mixer on low, add in the quick oats and mix until incorporated.  Drop dough in roughly equal amounts - about a Tbs. - onto cookie sheets covered in parchment paper.  Bake for 10-12 minutes (typically took about 10.5 mins).  The edges should just be starting to brown and the cookies should look just a little undercooked.  You do not want them to brown all over.  Move to a cooling rack and prepare the filling:

 In a small prep bowl, combine the very hot water and the 1/4 tsp. salt.  Allow the salt to dissolve and the water to cool.  Meanwhile, in the bowl of a stand mixer fitted with the whisk attachment, combine the marshmallow fluff, shortening, powdered sugar, and vanilla.  Beat until fluffy, about 3 minutes.  Add the cooled water and mix well.

Once cookies are cooled, spoon filling onto one cookie, and top with another cookie similar in shape and size.

Makes about 15 sandwiches.

If using optional chocolate: 
Combine approx. 1/2 cup semisweet chocolate chips and a splash of vegetable oil in a microwave safe bowl.  Microwave in 30 second intervals until melted and spreadable.  Spread thin layer on desired number of cookies before topping with filling.

Source:  Slightly adapted from Nosh With Me


Friday, August 12, 2011

Strawberry Muffins

 (Um...excuse the extreme close-up.  I wanted you to see the texture, apparently)

I have finally found a muffin recipe that my toddler - let's just call her Monkey, like I do - will eat.  And eat.  Wahoo!  Getting her to eat breakfast is a daily struggle.  I have tried countless recipes in an attempt to get her to eat something.  Anything.  Most days she'll take one bite, then run off playing.  So, I made these muffins and said a prayer.  And, she loved them.  Loved them!  The little Monkey even asked me for more - "Muffies, Muffies" - and ate another whole one, plus another half.  The best part about these?  Easy-peasy, and relatively healthy.  Oh, and no need for the stand mixer.  This whips up easily by hand.  You just need two bowls and a muffin tin.

The original recipe was for a blueberry muffin but I was out of blueberries, so I used fresh strawberries and changed the granulated sugar to brown.  It also called for whole wheat pastry flour, which I am out of.  I just split the difference and used half whole wheat and half all-purpose.  It worked beautifully, but feel free to change around as you'd like, or just follow the original recipe.

Strawberry Muffins:
1 cup whole wheat flour
1 cup all-purpose flour
1/2 cup brown sugar
1 tsp baking soda
1/2 tsp salt
1 large egg, beaten
1 cup unsweetened applesauce
1 tsp vanilla
2 tbsp melted Earth Balance butter (or regular butter if you're not avoiding milk)
1 1/2 cups strawberries, diced


Optional Topping:
2 Tbs. sugar
1 tsp. cinnamon

Preheat oven to 325.

Combine dry ingredients in a large bowl and mix until well combined.
In a medium bowl, beat the egg, then add in applesauce, vanilla and butter and combine. Add wet ingredients to dry ingredients and mix until just blended.  Gently fold in diced strawberries.

Divide batter evenly among 12 lined or greased muffin tins.

If using optional topping:
Combine sugar and cinnamon and sprinkle over batter (if you use the same bowl you melted the butter in, the remaining tiny bit of butter will make the topping crumblier, like a traditional topping).  Bake for 20-25 minutes, or until the tops spring back when gently touched.  Cool for several minutes and enjoy!

Source:  Adapted from Gina's Skinny Recipes.

Sunday, August 7, 2011

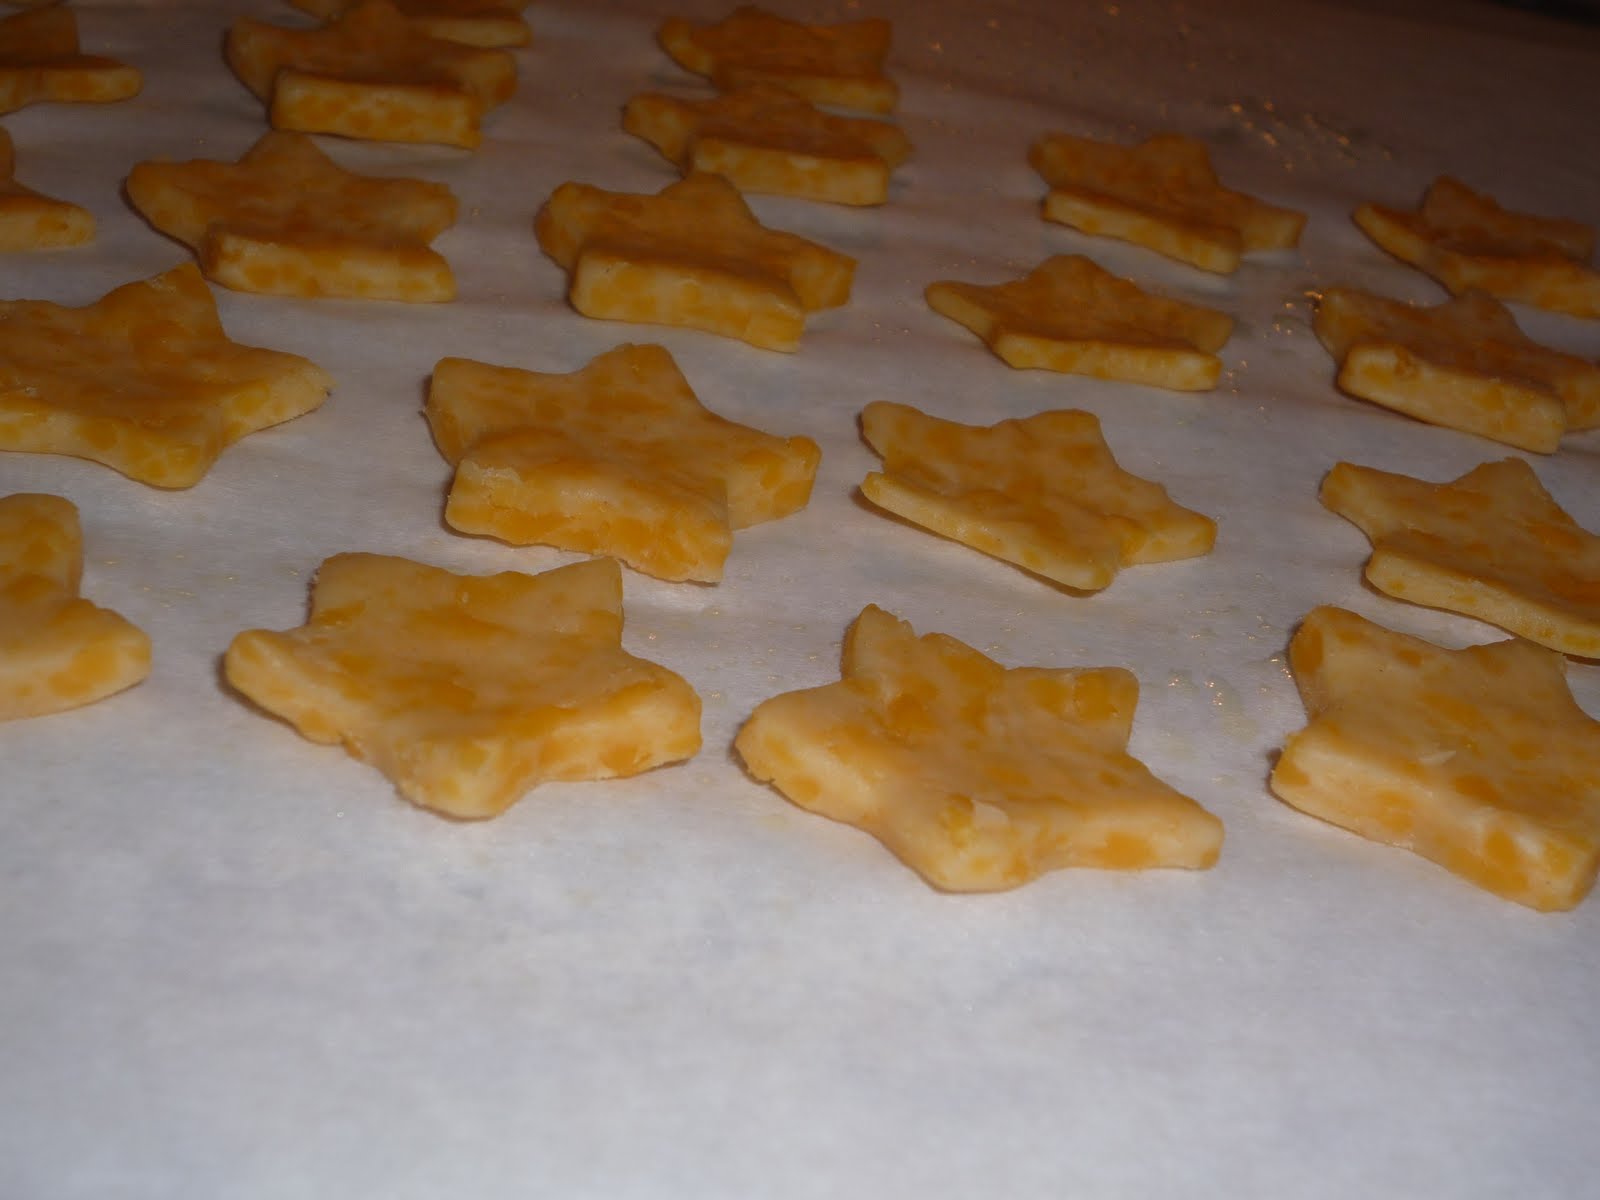
Homemade Cheez-it Stars

Um, okay.  So.  This recipe?  Amazing.  I just don't really know what else to say about it.

You see, I happen to love Cheez-its.  In an unhealthy, can-eat-an-entire-box-in-one-sitting kind of way.  It's really not a pretty sight.  But those cheesy little bits of baked heaven are beyond good.  Don't act like you don't agree.  You know they're fantastic.  Even if you're a foodie snob, you know there always comes a time when you find yourself in a dark room scarfing down those addictive crackers, hoping no one sees your face covered in that delectable powder.  Yum.  My little one - the two year old, that is - also loves the cheesy goodness.  But I never buy them for her.  Mainly because I will eat them all.  But, also (more importantly) because they are in no way healthy.  I mean, you just can't even pretend.  I don't know that there's a natural ingredient in the box.  I'm not a health-food freak by any means (which is obvious by this blog), but I do try to limit the amount of processed foods the little one eats.  I'm usually grateful she's willing to eat anything, but I just can't bring myself to indulge her joy over packaged crackers.  She'll thank me for it later.

Right?  Right.

It never crossed my mind that there may be a homemade version of Cheez-its.  I mean, how in the world could they be replicated?  Not possible.  But, this recipe made the Top 9 on FoodBuzz one day and I was sold.  I knew they had to be made.  The only down side to them?  I can't eat them!  With the milk-elimination diet I'm on, these are off limits.  UGH.  I did taste one just to make sure they were okay, and I could have easily eaten every single one of them that very moment.  Amazing.  You must bake them.  NOW.


Homemade Cheez-it Stars:
8 ozs. shredded, sharp cheddar cheese
3 Tbsp. butter, room temperature
1 Tbsp. shortening
1/2 teaspoon salt
1 cup flour
2 Tbsp. ice water
(The original recipe calls for salt for sprinkling, but I forgot this step and I just don't think they need it.  Your call)

Combine cheese, butter, shortening and salt in the bowl of a stand mixer with the paddle attachment.  It will be crumbly.  Slowly add flour then ice water.  If you need it (though I didn't) add just a few drops of water to help the dough come together.  But, you do not want a wet dough, so be careful.


Form dough into two discs and wrap in plastic wrap.  Chill for at least 30 minutes (I let mine chill for a few hours).


After dough is chilled, preheat oven to 375.  Roll each disc to 1/8" thickness and cut into desired shapes.  I used a small, star fondant cutter.  The original recipe calls for cutting into squares using a pastry wheel.  Again, your call.  The original recipe also calls for poking a hole in each piece with a toothpick.  I did not do this and don't think it needed it.

If your dough is difficult to work with, just return it to the fridge for a bit.  Bake at 375 for 10-15 minutes until they are just beginning to brown and puff up.  I usually only needed about 10 minutes.  If you remove the crackers and they are not crispy enough, just place them back in the oven for a minute or two.  But, be careful.  You don't want them to burn.  Makes several dozen.


Adapted slightly from In Katrina's Kitchen.

Thursday, August 4, 2011

Homemade Graham Crackers


I have been wanting to make homemade graham crackers for a while now.  My toddler loves them and since they are one of the few things she will eat, I don't usually stop her from eating them.  I just don't like all the preservatives in them.  A box of store-bought grahams has what, 20 ingredients?  Obviously, there has to be a better solution.  We're going on a road trip this weekend and will need snacks, so I decided now was the perfect time.  These were incredibly easy, and delicious, and I made them milk-free with no problem.

The original recipe called for two tablespoons of molasses, which I used, but next time I think I would change that to honey, so the recipe would use 4 Tbsp. honey all together - I have reflected this below.  I'm just not a huge molasses fan, unless it's in barbecue sauce.  Also, these would be delicious topped with a sugar & cinnamon mixture.  Enjoy!

Homemade Graham Crackers:
1/2 cup all-purpose flour
1 3/4 cups whole-wheat flour
1/2 cup sugar
1 teaspoon baking powder
1/2 teaspoon baking soda
1/2 teaspoon salt
1/4 teaspoon ground cinnamon
1/2 cup cold butter, cut into approx. 16 cubes  (or Earth Balance vegan butter)
4 tablespoons honey
1/4 cup cold water
1 teaspoon vanilla extract

In the bowl of a food processor, combine flours, sugar, baking powder, baking soda, salt & cinnamon.  Pulse until the mixture is evenly distributed.  Add the butter and pulse until the mixture is crumbly, about 30 seconds.  Add the honey, water and vanilla and pulse until the dough comes together as a ball, around 30-60 seconds.


Place the dough between two sheets of wax paper and roll until it is 1/8" thick.  Chill for at least 1 hour while still between the wax paper.  (I chilled mine for about 2.5 hours and it was nice and firm, which made it easy to deal with).


Preheat oven to 350.  Take dough out of fridge and roll over one more time just to be sure it is evenly spread.  Use desired shape to cut out crackers.  Of course, you can just do traditional squares, but I wanted to do shapes that would be fun for my daughter (and, she likes anything that resembles a cookie).  Once the shapes are cut, use a toothpick to poke several holes in the crackers.  Place crackers on a parchment lined cookie sheet.  Since the crackers are fairly thin, you may need to use a greased rubber spatula to lift them off the paper and move to the cookie sheet (or, you can roll the dough out on parchment paper and simply pull away the scraps so you don't have to transfer the crackers at all).  Bake in the preheated oven for 10-15 minutes until edges begin to brown.  I found I needed between 10 & 12 minutes, but I know my oven tends to run hot.  Just watch them closely.  Makes around forty 2-inch crackers.   

Note:  If you do a second roll-out of the dough, place those cut-out shapes back in the fridge while the first batch is baking.


Source: Adapted from Baking Bites.

Monday, June 20, 2011

Chocolate Chip Cookie Dough Cupcakes with Cream Cheese Frosting

This weekend we had two cookouts to attend, and I was asked to bring dessert to both.  I wanted to make something that wasn't complicated but would wow all the same.  I've made these cupcakes a few times before and they are always a visually stunning hit (despite the lack of evidence from my poor photos below).  I should point out there are several components to these, but overall they are fairly easy to make.  The assembly process is the most difficult part and that's merely because it's a bit time consuming.  With a toddler and newborn, anything time consuming is something I just don't have time to tackle, so the fact that I plan to make these again in a few days should speak volumes.  After the girls went down for the night, I was able to get my much needed baking therapy and enjoyed every minute of it.  Hopefully, these will bring you some fun time in the kitchen as well!

My biggest pointers for these are to 1.) make the cupcakes and cookie dough filling the day before you need them; 2.) use a pastry bag to fill the cupcakes as it will be much quicker and less messy, and 3.) use a large, round pastry tip to frost them (and any other cupcakes you ever make).  The original recipe calls for a brown sugar icing (see link at bottom of recipe), but I thought that was just a bit too sweet.  I used cream cheese frosting because I felt like it cut the sweetness a bit.  And, because cream cheese frosting is always a hit.  Also, if you are feeling particularly ambitious, you can use the cupcake middles and any left over frosting and chocolate chips to create cake pops.  I really wanted to do this but that whole lack of time thing just kept getting in the way!


Chocolate Chip Cookie Dough Cupcakes with Cream Cheese Frosting:

Ingredients for the cupcakes:
3 sticks unsalted butter, at room temperature
1½ cups light brown sugar, packed
4 large eggs
2 2/3 cups all-purpose flour
1 tsp. baking powder
1 tsp. baking soda
¼ tsp. salt
1 cup milk
2 tsp. vanilla extract
1 cup chocolate chips (semisweet or bittersweet)


For the filling:
4 tbsp. unsalted butter, at room temperature
6 tbsp. light brown sugar, packed
1 cup plus 2 tbsp. all-purpose flour
7 oz. sweetened condensed milk
½ tsp. vanilla extract
¼ cup mini semisweet chocolate chips

For the frosting:
16 ozs. cream cheese
2 sticks butter
2 lbs. powdered sugar
2 tsp. vanilla extract

Garnish:
  • Tiny versions of your favorite chocolate chip cookie recipe (you may want to cook these a little longer than normal since the frosting will soften them up quite a bit)
  • Mini chocolate chips
To make the cupcakes, preheat the oven to 350° F.

Line two cupcake pans with paper liners (24 total).  In the bowl of a stand mixer fitted with the paddle attachment, combine the butter and brown sugar.  Beat together on medium-high speed until light and fluffy, about 3 minutes.  Mix in the eggs one at a time, beating well after each addition and scraping down the sides of the bowl as needed.

Combine the flour, baking powder, baking soda, and salt in a medium bowl.  Stir together to blend. Add the dry ingredients to the mixer bowl on low speed, alternating with the milk, beginning and ending with the dry ingredients, mixing each addition just until incorporated.  Blend in the vanilla. Fold in the chocolate chips with a spatula.

Divide the batter evenly between the cupcake liners.   Bake for 18-20 minutes, until a toothpick inserted in the center comes out clean.  Allow to cool in the pan 5-10 minutes, then transfer to a wire rack to cool completely.

To make the cookie dough filling, combine the butter and sugar in a mixing bowl and cream on medium-high speed until light and fluffy, about 2 minutes.  Beat in the flour, sweetened condensed milk and vanilla until incorporated and smooth.  Stir in the chocolate chips.  Cover with plastic wrap and refrigerate until the mixture has firmed up a bit, about an hour, if you plan to use immediately.  The dough can also be refrigerated overnight if you plan to assemble the next day.  If the dough becomes too stiff, microwave in 10 second intervals, making sure not to overheat or the mini chocolate chips will melt.

To fill the cupcakes, cut a cone-shaped portion out of the center of each cupcake.  Fill a disposable pastry bag with the dough and cut off the tip.  Squeeze the bag gently to fill each cupcake.  Do not worry about over-filling as it will be covered in frosting.

To make the frosting, beat together the butter and cream cheese in the bowl of a stand mixer fitted with the paddle attachment until creamy.  With the mixer on low, add in the confectioners’ sugar and mix until smooth.  Beat in the vanilla extract until smooth and well blended.

Frost the filled cupcakes as desired, sprinkling with mini chocolate chips and topping with mini chocolate chip cookies for decoration.

Source: Adapted from Annie's Eats.

Friday, June 10, 2011

Low Fat & Chewy Cranberry Chocolate Chip Granola Bars

This recipe is a must.  As in, go now, make it, marvel at the wonder of the easy-peazy granola and smile with glee when your picky toddler says, "Mmmm," as she bites into it for the first time.  Oh, and the most exotic ingredient in the recipe?  Oat flour.  Yup.  And you can make a suitable substitute for that by throwing some oats in the food processor if your heart so desires.

This recipe is not a traditional granola that uses difficult to find ingredients such as flaxseed or wheat germ or every nut known to man.  It's just full of oats and whatever you decide to put in it to spice up the flavor.  In our family, we tend to dig chocolate chips in our granola.  And, I like dried cranberries (and what Mama likes she gets, you know, since Mama's the one cooking).  But feel free to swap those out for anything you'd like.

Low Fat & Chewy Cranberry Chocolate Chip Granola Bars:
1 cup oat flour
1 tsp baking powder
1/2 tsp baking soda
1/2 tsp salt
1/2 tsp ground cinnamon
2 tbsp Earth Balance dairy-free butter, room temperature (or, regular butter if not dairy free)
1/2 cup unpacked brown sugar
1 large egg
1/4 cup honey
1/4 cup unsweetened apple sauce
1/2 tsp vanilla extract
2 cups quick or old fashioned oats
1 cup Ghiradelli semi-sweet chocolate chips
1/2 cup dried cranberries

Directions:

Preheat oven to 350 degrees and line a 9 x 9 baking pan with parchment paper that hangs over the sides so you can pull the bars out by the edges of the parchment paper.  Grease the paper.

Whisk together oat flour, baking powder, baking soda, salt and cinnamon.

In the bowl of a stand mixer, cream the butter and sugar on medium speed.  Mix in the egg followed by the honey, applesauce and vanilla extract.

With the mixer on low, add the flour mixture and the oats until just combined; by hand, fold in the chocolate chips and cranberries.


Move mixture to prepared baking dish, using your fingers to spread it evenly.   

 Bake for 20-25 minutes, or until light brown at the edges. 

Let cool for a few minutes then pull out of pan using edges of parchment paper and let cool completely on wire rack.  Move to fridge so it will set a bit firmer.  It may seem soft and undercooked, but once it cools it will set completely.  Cut into desired shape and size.

Source:  Adapted from Skinny Taste.